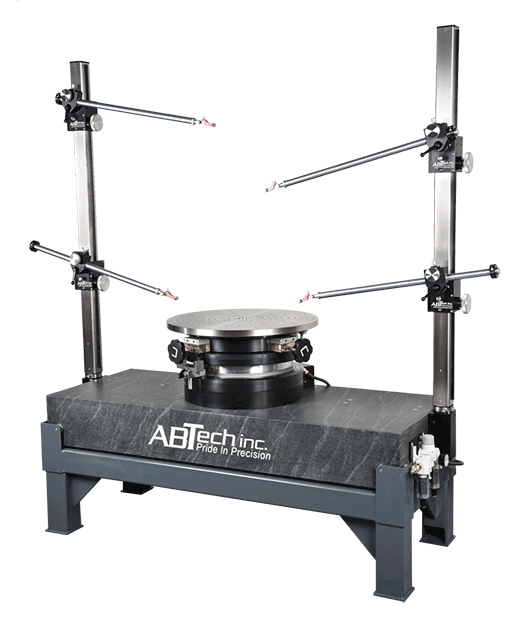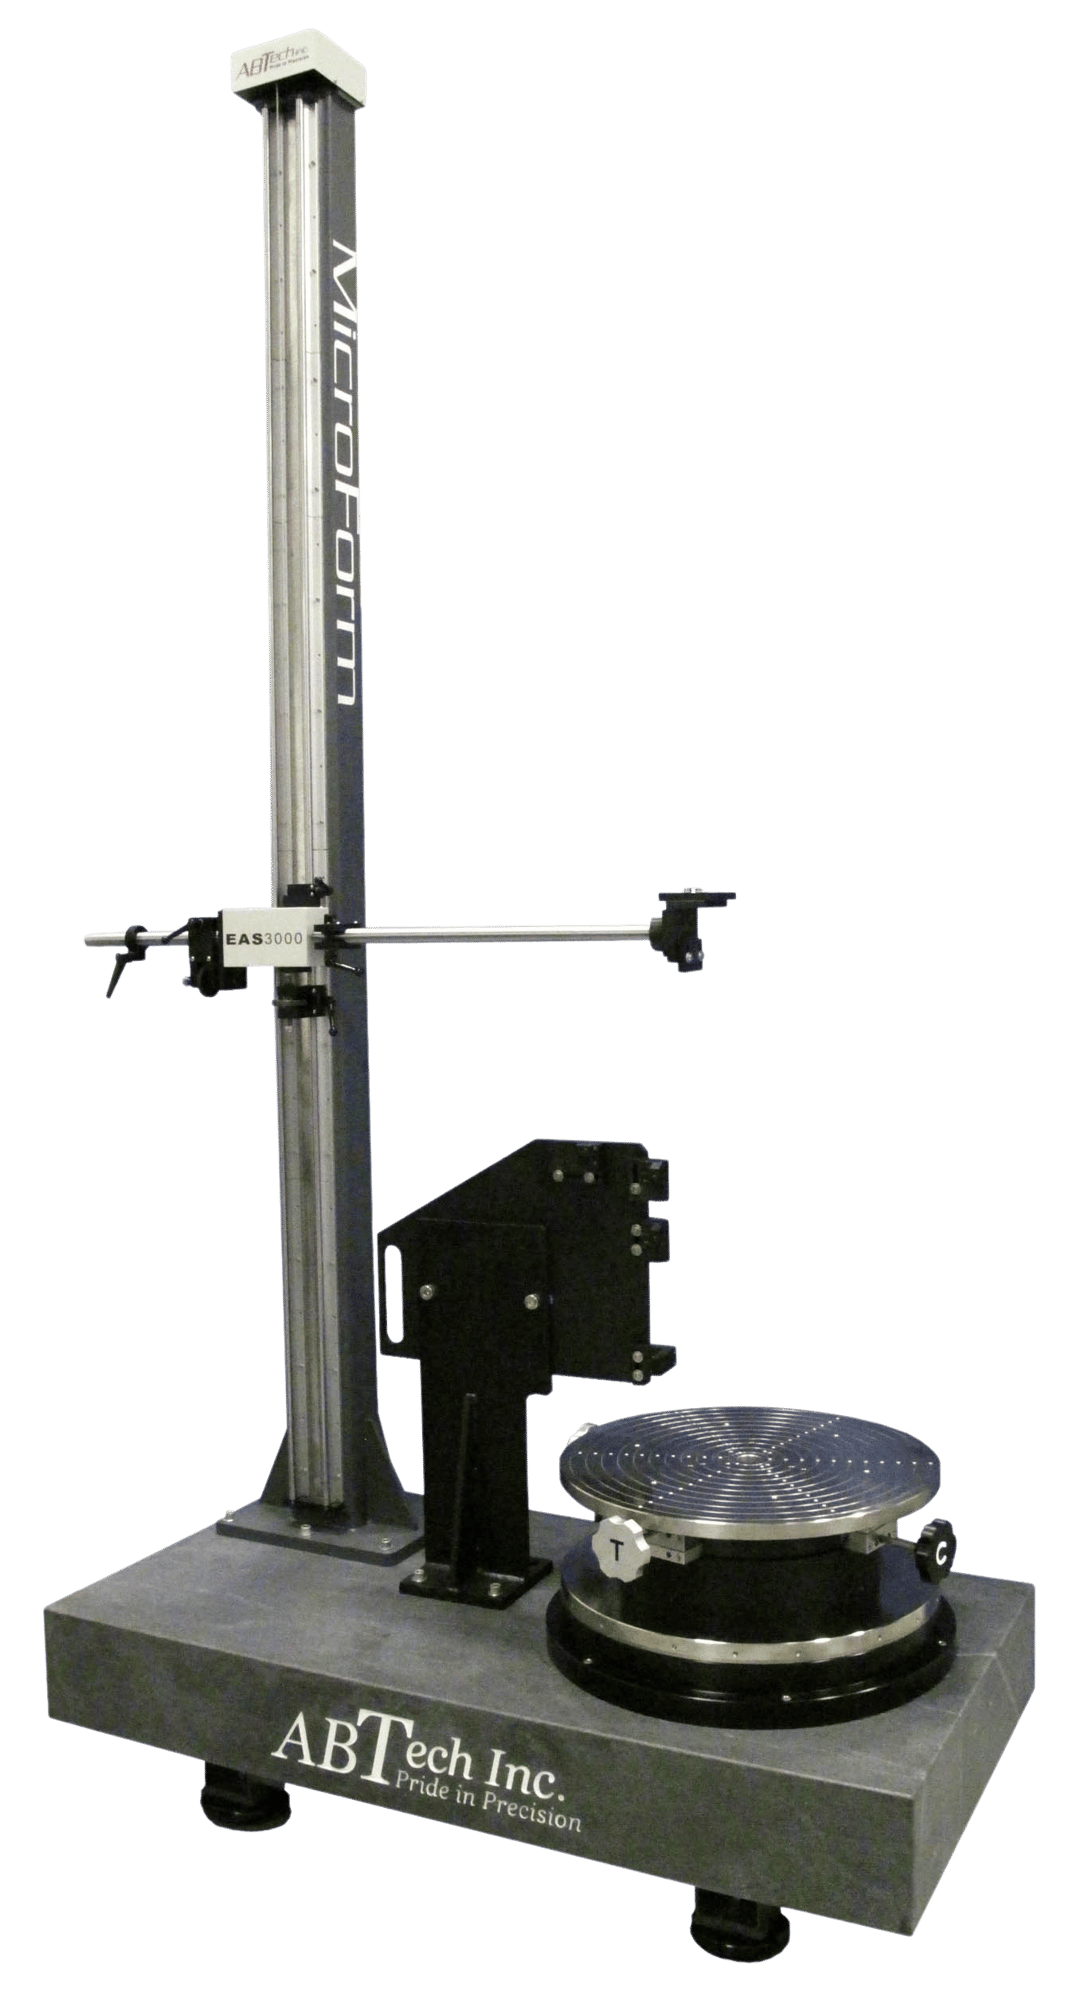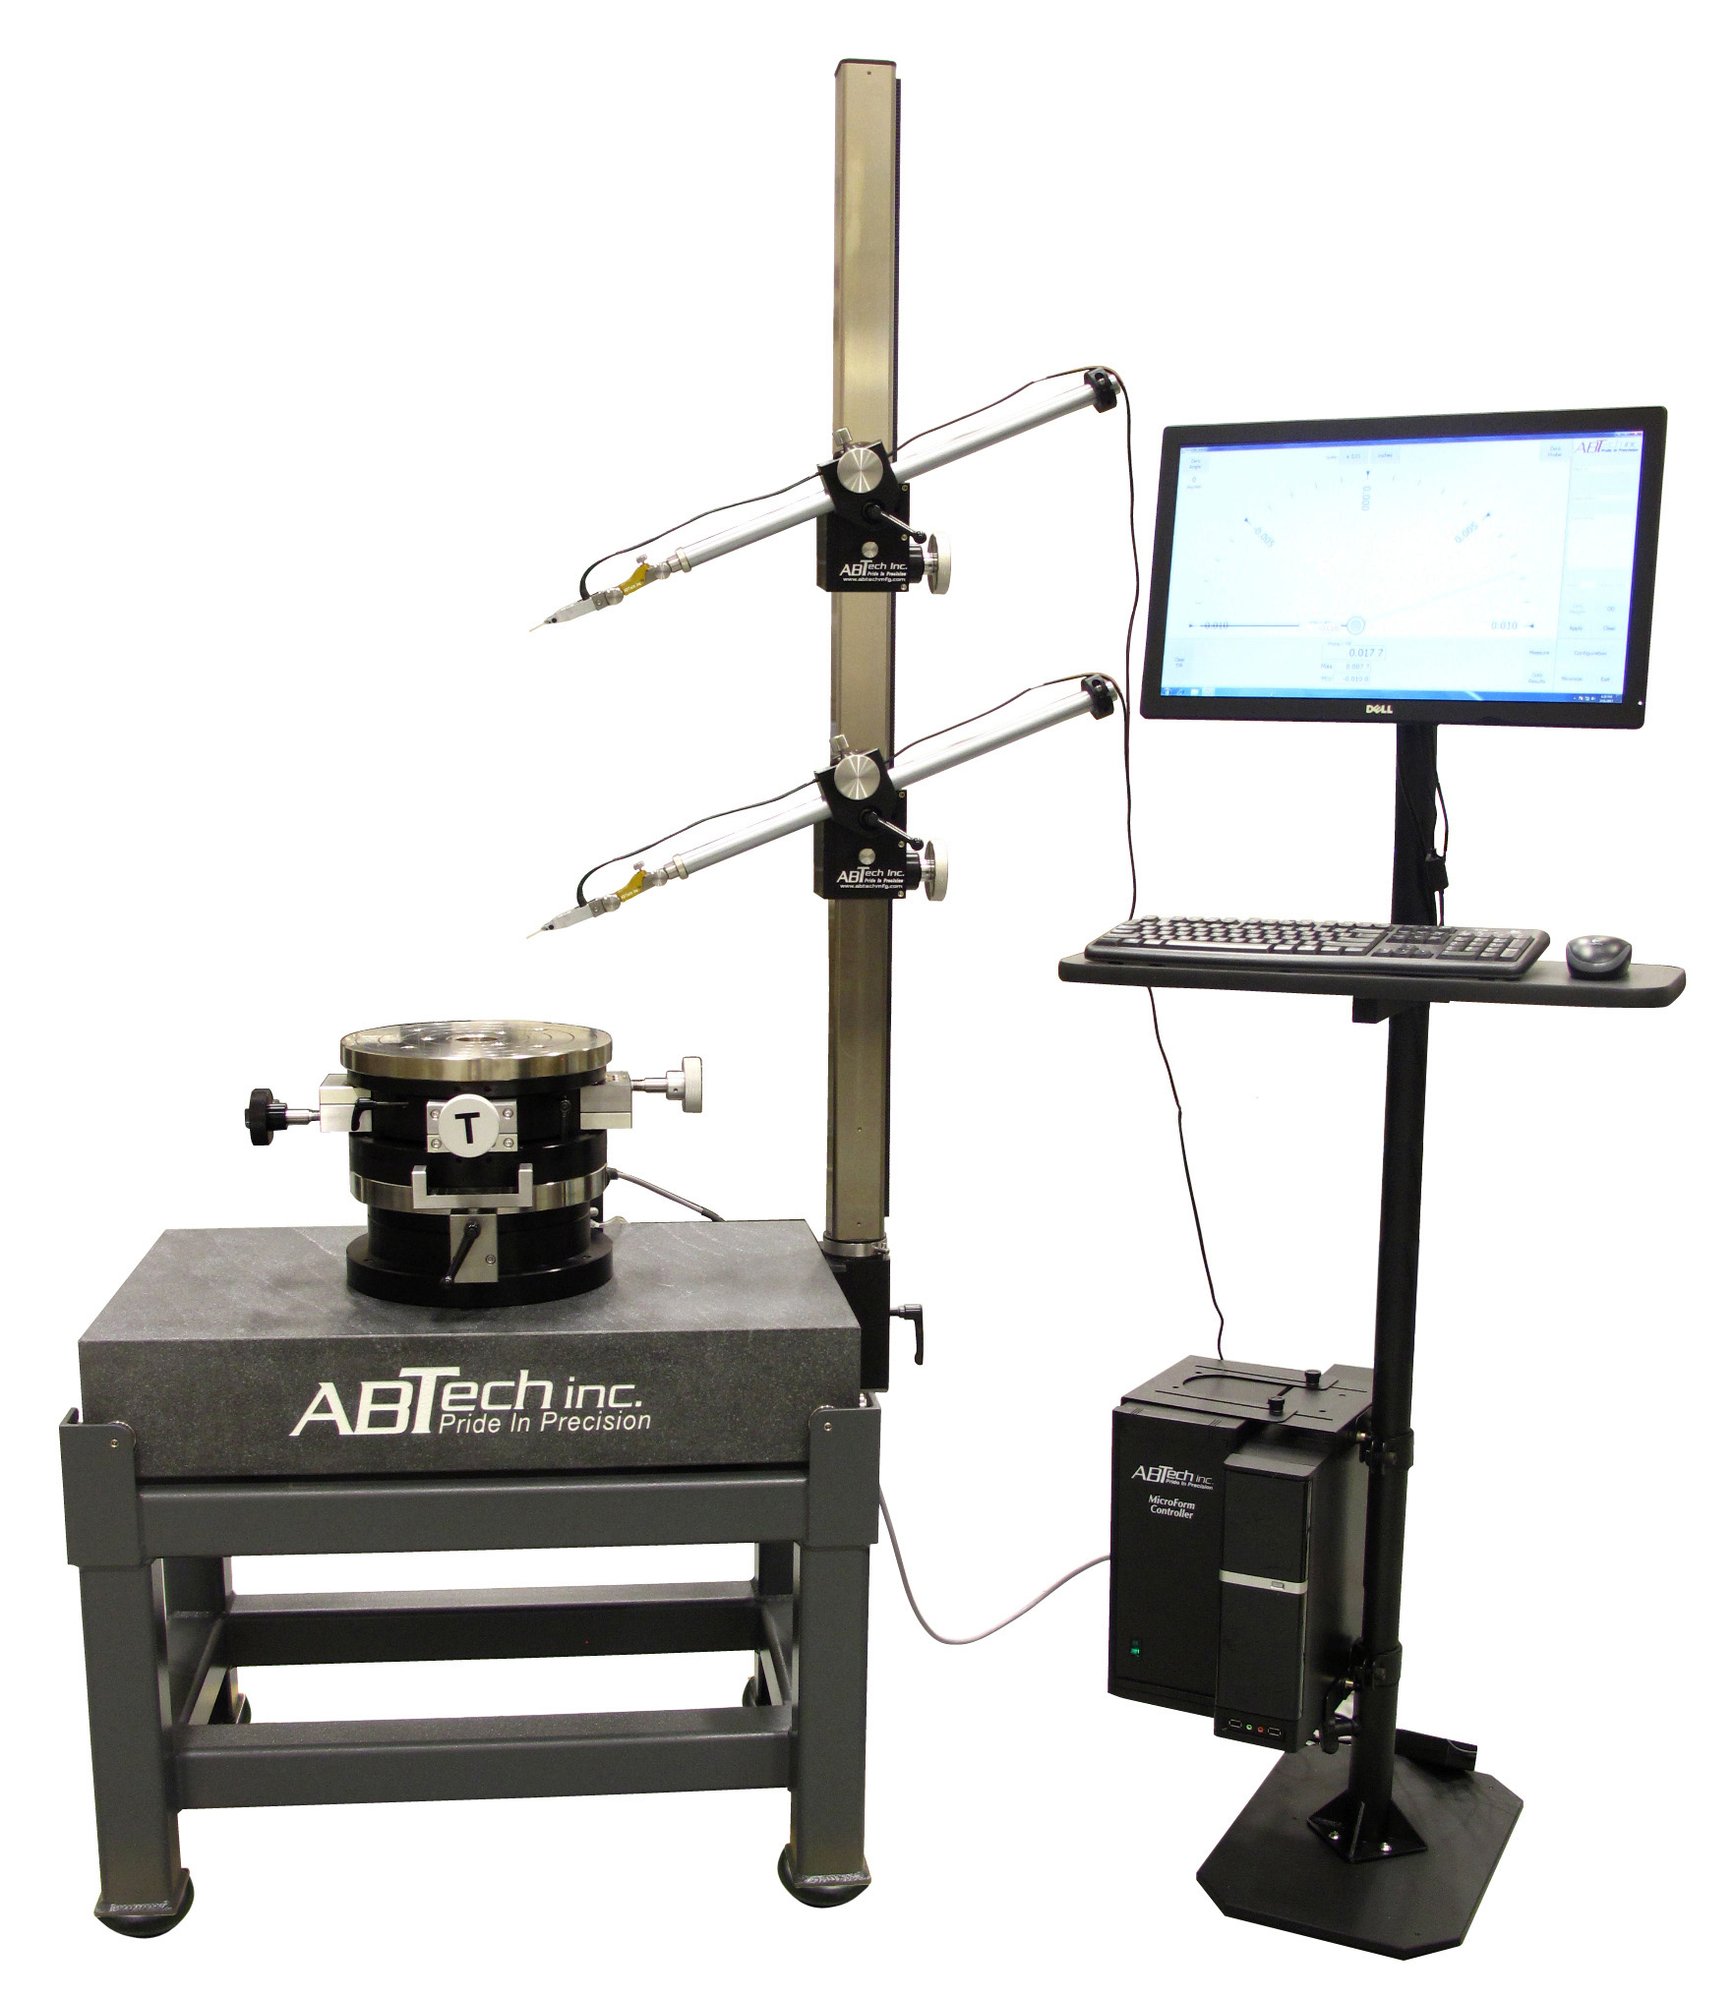
Accuracy is the most important measurement metric, but efficiency and usability are almost just as critical. That means having a gage that is straightforward to use by operators of all skill levels, which is an absolute necessity. Our FormStack™ gages are quicker to set up, easier to use than a CMM, offer higher accuracy with more reliable results.
Designed specifically for checking total indicator readings (TIR) on OD, ID, and faces of cylindrical parts, the FormStack™ is focused on maximizing throughput. The friction-free ultra-precise air-bearing rotary table provides a stable, robust, and maintenance-free reference axis with certified system accuracy better than 5 millionths of an inch (5m” or 0.125mm)
The FormStack™ gage basic configuration includes a single-precision lever-type electronic indicator, probe fine adjust, gage stand, rotary air-bearing with tilt and center worktable mounted to an inspection grade granite surface plate, and FormStack™ touch screen display providing a turnkey system.
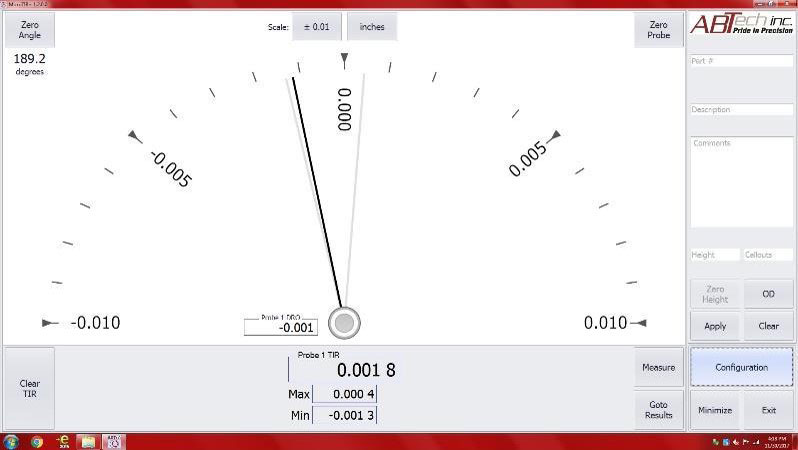
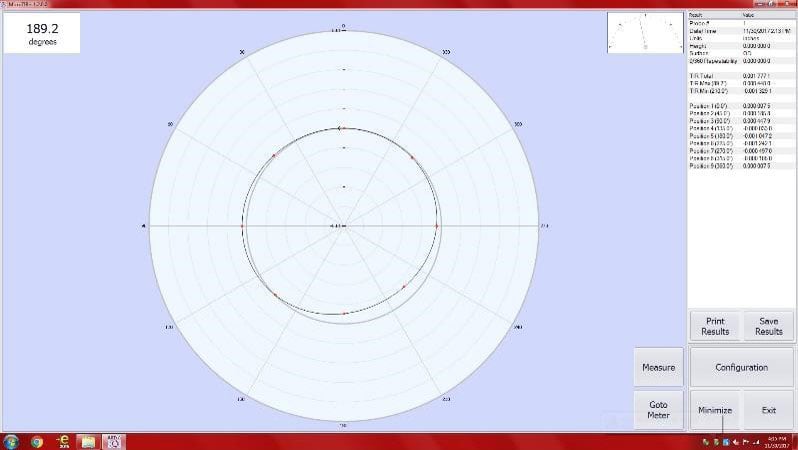
The user interface displays the results in a traditional analog-style needle and digital format. The maximum and minimum readings and TIR are captured removing potential operator error and user subjectivity. You can input part numbers and descriptions and your results can be saved or printed for customer verification or as a traveler for the part.
This versatile system allows you to measure and verify TIR on a wide array of parts ranging from gears, pistons, and jet-engine components for in-house inspection or incoming part inspections for vendor compliance.
Our FormStack Product Portfolio
Interested in Getting a Quote?
See What Our Customers are Saying
"We use 2 ABTech air-bearing spindles with tip/tilt and centering capability in our facility. These units are used for precision assembly and final metrology. We have never had an issue with either one, and the ABTech team is a great partner for us. We will be adding more systems as our young organization continues to grow".
Jayson Tierson
President, Vertex Optics
See What Our Customers are Saying
“Thanks a lot for your help [with remote technical support provided for the system installed at the South Pole]. Your rapid, informative correspondence was invaluable. Hopefully I won't be bothering you with any further questions, but it's good to know you're willing.”
Morgan Hedges
Post-Doctoral Research Associate, Princeton University
Benefits and Advantages
Lorem ipsum dolor sit amet, consectetur adipiscing elit. Etiam eu turpis molestie, dictum est a, mattis tellus. Sed dignissim, metus nec fringilla accumsan, risus sem sollicitudin lacus, ut interdum tellus elit sed risus. Maecenas eget condimentum velit, sit amet feugiat lectus. Class aptent taciti sociosqu ad litora torquent per conubia nostra.
Maecenas eget condimentum velit, sit amet feugiat lectus. Class aptent taciti sociosqu ad litora torquent per conubia nostra.
Lorem Ipsum Dolor Sit Amet Consectetur Adipiscing ?
Adipiscing elit. Etiam eu turpis molestie, dictum est a, mattis tellus. Sed dignissim, metus nec fringilla accumsan lorem ipsum dolor sit amet.
Lorem Ipsum Dolor Sit Amet Consectetur Adipiscing ?
Adipiscing elit. Etiam eu turpis molestie, dictum est a, mattis tellus. Sed dignissim, metus nec fringilla accumsan lorem ipsum dolor sit amet.
Lorem Ipsum Dolor Sit Amet Consectetur Adipiscing ?
Adipiscing elit. Etiam eu turpis molestie, dictum est a, mattis tellus. Sed dignissim, metus nec fringilla accumsan lorem ipsum dolor sit amet.
Lorem Ipsum Dolor Sit Amet Consectetur Adipiscing ?
Adipiscing elit. Etiam eu turpis molestie, dictum est a, mattis tellus. Sed dignissim, metus nec fringilla accumsan lorem ipsum dolor sit amet.
FAQ's
Some Lorem ipsum faqs will be here with subheading
Who we are working with?
Adipiscing elit. Etiam eu turpis molestie, dictum est a, mattis tellus. Sed dignissim, metus nec fringilla accumsan lorem ipsum dolor sit amet.
What is the process of purchasing
Adipiscing elit. Etiam eu turpis molestie, dictum est a, mattis tellus. Sed dignissim, metus nec fringilla accumsan lorem ipsum dolor sit amet.
Lorem Ipsum Dolor Sit Amet Consectetur Adipiscing ?
Adipiscing elit. Etiam eu turpis molestie, dictum est a, mattis tellus. Sed dignissim, metus nec fringilla accumsan lorem ipsum dolor sit amet.
Lorem Ipsum Dolor Sit Amet Consectetur Adipiscing ?
Adipiscing elit. Etiam eu turpis molestie, dictum est a, mattis tellus. Sed dignissim, metus nec fringilla accumsan lorem ipsum dolor sit amet.
Why choose us
Aptent taciti sociosqu litora torquent
Lorem ipsum dolor sit amet, consectetur adipiscing elit. Etiam eu turpis molestie, dictum est a, mattis tellus. Sed dignissim, metus nec fringilla accumsan, risus sem sollicitudin lacus, ut interdum tellus elit sed risus.


