Quickly & Easily Measure Precision Geometric Forms with Unmatched Performance
The foundation of our MicroForm line of roundness gages is an ABTech designed and built precision air-bearing rotary table providing a stable, robust and maintenance-free reference axis with certified system accuracy better than 5 millionths of an inch (5m” or 0.125 mm).
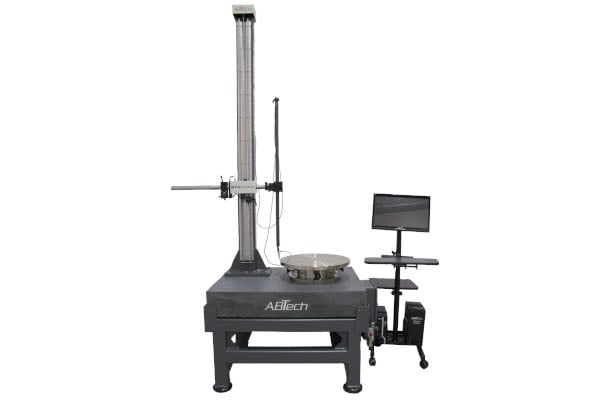
Our powerful yet intuitive software simplifies navigation, and the touchscreen interface displays the results in a straightforward and familiar way. Combined, these ease-of-use features allow operators of all skill levels to take exacting measurements on the shop floor or in the QC lab. Standard features also include auto-interrupt, harmonic analysis, polar and strip chart reports, and PDF printable reports.
MicroForm gages measure roundness, runout, flatness, concentricity (in and out of plane), parallelism, and perpendicularity. A unique analog-style TIR meter simplifies part alignment and provides a quick in-process shop floor check. They are deployed for a variety of manufacturing and quality functions including in-coming inspection for vendor compliance, in-process tolerance confirmation, manufacturing process control, and quality control.
All models let you rapidly switch from a face to a diameter feature or an ID to OD. The articulating arm and probe mount feature detents at 90 degrees for quick and stable movement so you will not waste time wrestling with locks or swivel joints.
Unique Large and Tall Part Capabilities
These gages are turnkey systems with working load capacities up to 6,000 lbs and worktable diameters up to 48" without compromising accuracy or repeatability. With our counterbalanced tower designs, the sky is practically the limit for the vertical height of the probe.
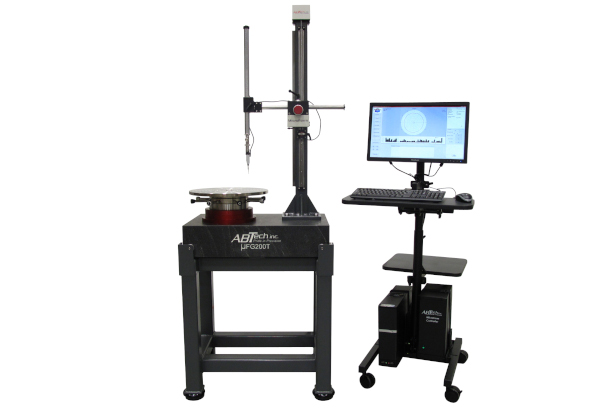
µFG200T
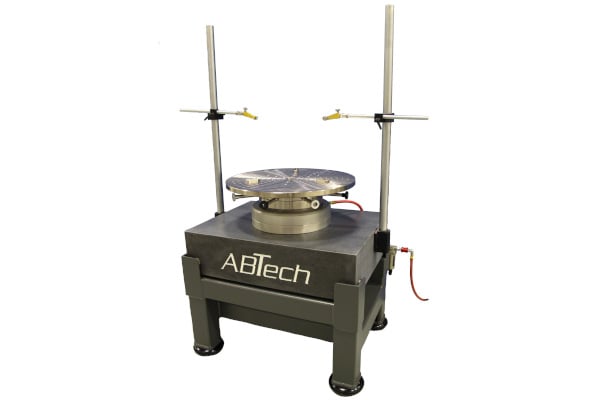
µFG300
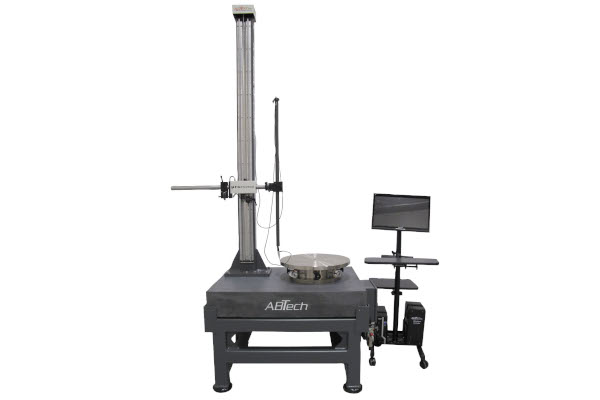
µFG450
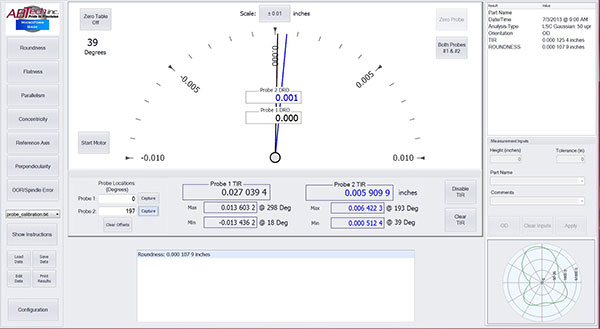
Main Screen with Analog Style TIR Meter
MicroForm’s intuitive software features two simple views that clearly layout access and navigation. On the left sidebar of the main screen, you will find all the form options are always visible. The analog-style TIR meter is large and easy to read. For the novice operators, on-screen “step by step” instructions are available. The touch screen allows quick navigation between main and results screens.
Results Screen with Polar Chart

The results screen and large polar chart are uncluttered and easy to read. You can quickly print or save a pdf file of the data. And to provide remote file storage and enterprise connectivity, each PC includes an Ethernet network card. Auto interrupt feature allows automatic exclusion of interrupted surfaces or easily edit out using our drag and exclude feature.
Harmonic Analysis Results

The flexibility to analyze part harmonics (slope and lobing optional) right on the results screen. Or, export the data for statistical process control (SPC).
Interested in Getting a Quote?
Features & Benefits
Precision & Stability
Ultra-smooth rotary table with a responsive probe and precise gage stands.
Efficient Processing
Real-time system with FPGA platform eliminates PC resource conflicts.
Simplified Setup
Tilt & center worktable ensures accuracy and reduces setup time.
User-Friendly Design
Intuitive touchscreen navigation for all skill levels.
Customizable Outputs
Adjustable filters, scales, units, and analysis types.
Technical Details
- Optional integrated motor drive
- Universal style gage stand on a T-slot base (replaces the articulating arm style)
- Second gage stand and probe with dual-probe software upgrade
- Vacuum worktable and controller to hold sensitive lightweight parts safely and securely
- Various probe lengths, tip diameters and materials
- Welded steel base frames with vibration isolation leveling casters
- Electronics cart to house PC, monitor and MicroForm controller
- Precision centering fixtures, custom collets and part-specific fixtures
- Certified 2µ” round master test ball and cover for system accuracy verification
MicroForm Spec Sheet Table
| μFG100 | μFG150 | μFG200 | μFG200T | μFG300 | μFG400 | |
| System Accuracy | ||||||
| Radial & Axial | <5.0 μ" (0.125μm) | |||||
| Tilt | <.2 or 1.0μ"/in (0.25μm/25mm) | |||||
| Working Envelope | ||||||
| Maximum Part Diameter (swing) |
8" 203mm |
12" 305mm |
16" 406mm |
16" 406mm |
24" 610mm |
32" 813mm |
| Maximum Part Height (OD probe access) |
12" 305mm |
16" 406mm |
20" 508mm |
36" 914mm |
60" 1.524m |
60" 1.524m |
| Height to Worktable | 8.75" / 222mm | 9.60" / 244mm | 40" / 1.041m | 41" / 1.041m | 37" / 940mm | 30" / 762mm |
| Axial Load Capacity | 60 lbs / 27 Kg | 125 lbs / 57 Kg | 500 lbs / 226 Kg | 500 lbs / 226 Kg | 1,000 lbs / 454 Kg | 2,000 lbs / 907 Kg |
| Tilt & Center Worktable Configurations | ||||||
| Diameter | 6" / 150mm | 6" / 150mm | 8" / 203mm | 8" / 203mm | 12" / 305mm | 16" / 406mm |
| Thru-hole (removable plug) |
1.25" 31.75mm |
1.25" 31.75mm |
1.51" 38.35mm |
1.51" 38.35mm |
1.75" 44.45mm |
2.00" 50.80mm |
| Tapped Holes | 1/4 - 28 tapped holes | |||||
| Knob Configuration | 2 centering, 2 leveling at 90° |
4 centering, 4 leveling at 90° | ||||
| Gage Stand Configuration | ||||||
| Style | "High Output" Articulating Arm | Mini Tower | Counterbalance Tower | |||
| Quantity | Single | Single(standard) & Dual Probe (option) | ||||
| Misc. Details | ||||||
| Software | ABTech Micro TIR Software | |||||
| Metrology Controller | "FPGA" based "real-time" operating system housed in surface plate |
Independent electrical box contains "FPGA" based "real-time" operating |
||||
| PC | Windows OS Industrial PC with 10" touchscreen | Windows OS Industrial PC with 22" touchscreen | ||||
| Air Consumption | 2.0 cfm @ 60psi, equipped with dual stage filter/regulator assembly | |||||
| Product Dimension | 10" W x 12" D x 28" T | 16" W x 16" D x 32" T | 20" W x 24" D x 62" T | 26" W x 20" D x 92" T | 77" W x 42" D x 106" T | 90" W x 42" D x 106" T |
| 254 x 305 x 711 mm | 406 x 406 x 813 mm | 508 x 610 x 1575 mm | 914 x 508 x 2337 mm | 1956 x 1067 x 2692 mm | 2286 x 1067 x 2692 mm | |
| Product Weight | 60 lbs | 120 lbs | 400 lbs | 650 lbs | 2300 lbs | 2600 lbs |
| 27 kg | 55 kg | 180 kg | 295 kg | 1050 kg | 1180 kg | |
See What Our Customers are Saying
"We use 2 ABTech air-bearing spindles with tip/tilt and centering capability in our facility. These units are used for precision assembly and final metrology. We have never had an issue with either one, and the ABTech team is a great partner for us. We will be adding more systems as our young organization continues to grow".
Jayson Tierson
President, Vertex Optics
See What Our Customers are Saying
“Thanks a lot for your help [with remote technical support provided for the system installed at the South Pole]. Your rapid, informative correspondence was invaluable. Hopefully I won't be bothering you with any further questions, but it's good to know you're willing.”
Morgan Hedges
Post-Doctoral Research Associate, Princeton University
Benefits and Advantages
Lorem ipsum dolor sit amet, consectetur adipiscing elit. Etiam eu turpis molestie, dictum est a, mattis tellus. Sed dignissim, metus nec fringilla accumsan, risus sem sollicitudin lacus, ut interdum tellus elit sed risus. Maecenas eget condimentum velit, sit amet feugiat lectus. Class aptent taciti sociosqu ad litora torquent per conubia nostra.
Maecenas eget condimentum velit, sit amet feugiat lectus. Class aptent taciti sociosqu ad litora torquent per conubia nostra.
Lorem Ipsum Dolor Sit Amet Consectetur Adipiscing ?
Adipiscing elit. Etiam eu turpis molestie, dictum est a, mattis tellus. Sed dignissim, metus nec fringilla accumsan lorem ipsum dolor sit amet.
Lorem Ipsum Dolor Sit Amet Consectetur Adipiscing ?
Adipiscing elit. Etiam eu turpis molestie, dictum est a, mattis tellus. Sed dignissim, metus nec fringilla accumsan lorem ipsum dolor sit amet.
Lorem Ipsum Dolor Sit Amet Consectetur Adipiscing ?
Adipiscing elit. Etiam eu turpis molestie, dictum est a, mattis tellus. Sed dignissim, metus nec fringilla accumsan lorem ipsum dolor sit amet.
Lorem Ipsum Dolor Sit Amet Consectetur Adipiscing ?
Adipiscing elit. Etiam eu turpis molestie, dictum est a, mattis tellus. Sed dignissim, metus nec fringilla accumsan lorem ipsum dolor sit amet.
FAQ's
Some Lorem ipsum faqs will be here with subheading
Who we are working with?
Adipiscing elit. Etiam eu turpis molestie, dictum est a, mattis tellus. Sed dignissim, metus nec fringilla accumsan lorem ipsum dolor sit amet.
What is the process of purchasing
Adipiscing elit. Etiam eu turpis molestie, dictum est a, mattis tellus. Sed dignissim, metus nec fringilla accumsan lorem ipsum dolor sit amet.
Lorem Ipsum Dolor Sit Amet Consectetur Adipiscing ?
Adipiscing elit. Etiam eu turpis molestie, dictum est a, mattis tellus. Sed dignissim, metus nec fringilla accumsan lorem ipsum dolor sit amet.
Lorem Ipsum Dolor Sit Amet Consectetur Adipiscing ?
Adipiscing elit. Etiam eu turpis molestie, dictum est a, mattis tellus. Sed dignissim, metus nec fringilla accumsan lorem ipsum dolor sit amet.
Why choose us
Aptent taciti sociosqu litora torquent
Lorem ipsum dolor sit amet, consectetur adipiscing elit. Etiam eu turpis molestie, dictum est a, mattis tellus. Sed dignissim, metus nec fringilla accumsan, risus sem sollicitudin lacus, ut interdum tellus elit sed risus.


